VSS Carving - Pt. 2, Halfway There

I intended for this to at least be a two part series, part 1 is here. I'm not sure yet if this will be the end of it or not. I did successfully recover some information from a deleted snapshot, so success there. However, I still don't feel like this is reproducible enough to rely on it in a live environment.
I left off last time at a point where I had working tools, but wasn't recovering any snapshots. mnrkbys on GitHub gave me some things to work from and I was able to figure out what images contained snapshots, and which ones didn't. As it turns out, vmware-vdiskmanager.exe does not grab the most up-to-date disk when snapshots are in use. In other words, you get the base image, not any deltas after the first snapshot is made. If you haven't made any snapshots you're good. If you have, the only way I've found to deal with this is to delete all snapshots, at which point VMWare will merge the deltas and you can export the disk. There's no way I've found to merge/export the disk without deleting the snapshots, which isn't ideal.
Anyway, at least now we have an environment we can test in.
1) Prep an image as we were doing before
Quick summary to get us to this point, skip to #2 if you know this part. My current image has split VMDK's ("Split virtual disk into multiple files") so I use vmware-vdiskmanager.exe to flatten them into one file:
C:\Program Files (x86)\VMware\VMware Workstation>vmware-vdiskmanager.exe -r "c:\Users\nullsec\Documents\Virtual Machines\Windows Server 2019\Windows Server 2019.vmdk" -t 0 C:\vss_test\test.vmdk
Creating disk 'C:\vss_test\test.vmdk'
Convert: 100% done.
Virtual disk conversion successful.

C:\Program Files (x86)\VMware\VMware Workstation>
Now over to WSL to convert the VMDK to raw:
nullsec@ISAAC:~/vss_carver$ qemu-img convert -p -f vmdk -O raw /mnt/c/vss_test/test.vmdk /mnt/c/vss_test/test.raw
    (100.00/100%)
nullsec@ISAAC:~/vss_carver$
Find the offset by pointing fdisk -l at our raw image. Not going to show the whole output here since your offset might be different, but remember, we want to multiple the sector size by the primary drive start location to get the offset in bytes. In my case it was 512*1259520=644874240
Now we can use vss_carver.py, only be successful this time because we've removed all of our snapshots, right?
2) Carve for the snapshots
Here's my output, note "VSS snapshot was enabled. But all snapshots were deleted." Yay! We have something!
nullsec@ISAAC:~/vss_carver$ python3 vss_carver.py -t raw -o 644874240 -i /mnt/c/vss_test/test.raw -c /mnt/c/vss_test/catalog -s /mnt/c/vss_test/store
vss_carver 20200312
==================================================
Stage 1: Checking if VSS is enabled.
Volume size: 0x719800000
Found VSS volume header.
0x1e00: b'6b87083876c1484eb7ae04046e6cc752'
Catalog offset: 0x0
==================================================
Stage 2: Reading catalog from disk image.
VSS snapshot was enabled. But all snapshots were deleted.
==================================================
Stage 3: Carving data blocks.
Started at 2022/06/15 16:08:21
Progress: 30492590080 / 30492590080 bytes (100.00%) at 2022/06/15 16:13:16
Finished at 2022/06/15 16:13:16
==================================================
Stage 4: Grouping store blocks by VSS snapshot.
==================================================
Stage 5: Checking next block offset lists.
==================================================
Stage 6: Deduplicating carved catalog entries.
==================================================
Stage 7: Writing store file.
==================================================
Stage 8: Writing catalog file.
3) Mounting Recovered Snapshots
I used vshadowmount.exe back on the Windows side to access the shadows. That can be found here, this is the same link as on the vss_carver GitHub. Download the entire thing and look for vshadowmount.exe in \vshadow\libvshadow-vss_carver\x64. One thing I noticed is that it complained about not having a dokan1.dll. I don't know where this dll should come from, but a quick search of my computer found one in Arsenal Image Mounter under lib\x64. I copied that into the same directory as vshadowmount.exe and everything worked.
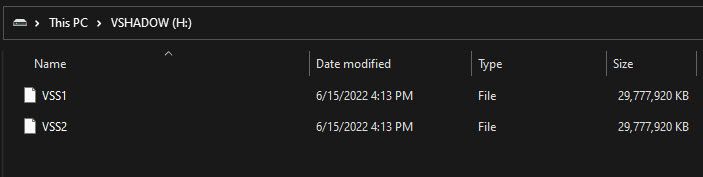
C:\vss_test\vshadow\libvshadow-vss_carver\x64>vshadowmount.exe -o 644874240 -c C:\vss_test\catalog -s c:\vss_test\store c:\vss_test\test.raw H:\
vshadowmount 20191221

mount_dokan_ZwCreateFile: unable to retrieve file entry for path: \Images\Camera.
mount_dokan_ZwCreateFile: unable to retrieve file entry for path: \DCIM.
... etc ...
We need our offset (644874240) here again, the catalog and store file we created with vss_carver.py, our raw image, and a mount point. I used H:\ here, but you should be able to use any free drive letter. The "unable to retrieve" messages seem normal/expected?
Ok, what do we do with these?
4) Recovering Data
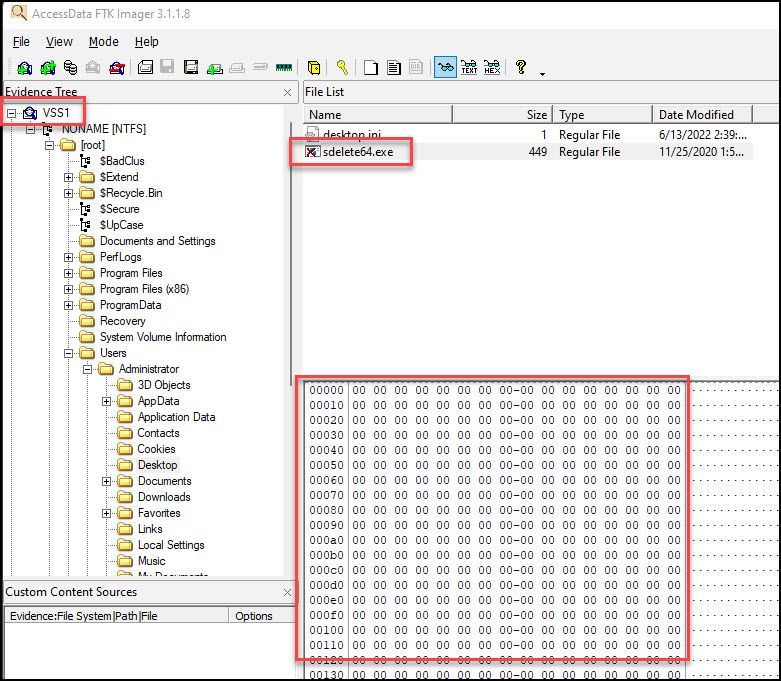
I tried a couple of different ways of accessing these, and in the process stumbled across a post by H. Carvey explaining some of the things he tried. TL;DR up front, using FTK Imager -> Add Evidence File -> Image File seems to be the only thing that works.
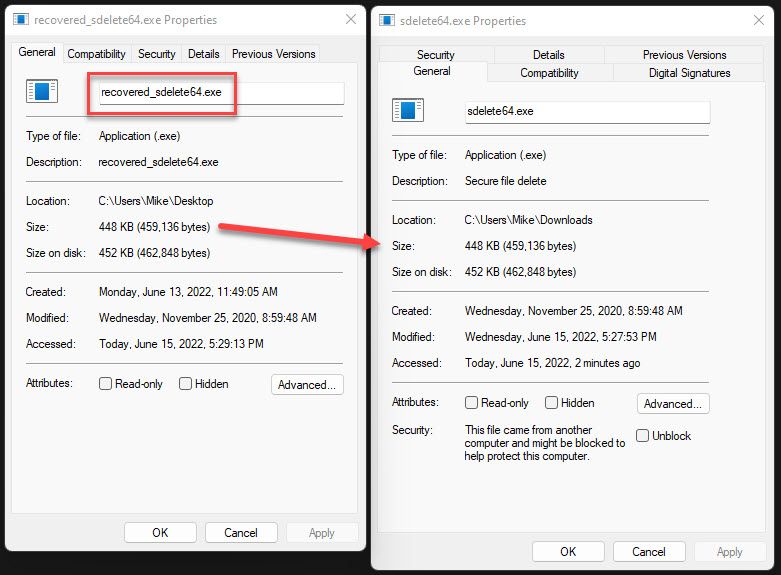
The screenshots below does show one file that was deleted from the disk. There should have been more, and as we can see, the actual file is gone (file filled with null bytes). However, we can at least tell what the name and size of the file was, potentially giving us insight as to what was done. Not ideal though.
I did try Arsenal Image Mounter. The free version from their website doesn't work at all. Possibly the paid version would, using the file system driver bypass or the Mount VSCs option, but I don't have that. The Github version does sort of work after some fiddling. I had to find 3 dll's to make it happy though. libewf.dll I found in the set of precompiled binaries for vshadowmount.exe that we downloaded earlier, under libewf\x64. msvcr100.dll I found under C:\Windows\System32. zlib.dll I found under the free Arsenal download again, same place we found dokan1.dll, in \lib\x64. After placing all of these in the same directory as ArsenalImageMounterMountTool.exe, it worked. Again, sort of. Mount Raw Image works, but the Write Temporary option is greyed out. Read only won't let you bypass/modify Windows permissions, so your access is limited. Write original will, presumably, modify the evidence, which may not be ideal. Mount through DiscUtils gives you a Write Temporary option, but then throws a "Specified method is not supported" error. Mount through libewf and libaff4 also throw errors, I didn't go very far down that path.
5) What's next?
As I said when I started this, I'm not sure if there will be a part 3 or not. If there is, I would like to recover actual, useful files. I would also like to perform the recovery on enterprise hypervisors (ESXi and Hyper-V ideally). That said, there's a lot of variables to take into consideration. Are there snapshots/checkpoints on the hypervisor side (and how does this change things compaired to Workstation)? Are ScopeSnapshots enabled or disabled? How long ago was the snapshot deleted? Even if I get this to a consistantly reproducable state where file recovery is easy in a lab environment, will it ever be useful in an actual incident? What are the odds of VSS being enabled on a server (as it's disabled by default)? What are the odds that, if it is, it contains useful files or evidence?